18 Jan 2024
6 Min Read
Processing Streaming Data with WarpStream & DeltaStream
WarpStream is an Apache Kafka® compatible data streaming platform built directly on top of object storage. It’s delivered as a single, stateless Go binary eliminating the management of local disks, rebalancing of brokers and operating ZooKeeper to operate. WarpStream clusters can scale out, and in, instantaneously, without rebalancing.
DeltaStream is a serverless stream processing platform powered by Flink. With features including Role-Based Access Control (RBAC), Streaming Catalog and Materialized Views, DeltaStream offers all the capabilities needed to process, share and govern ALL your streaming data across your streaming storage systems.
In this blog post, we will walk you through a simple but powerful use case that demonstrates how to process a stream of data produced by a WarpStream cluster using DeltaStream.
Before getting started, sign up for DeltaStream and WarpStream. Also, make sure to install the WarpStream CLI by running the following command into your Terminal:
We’re also going to use a producer client that’s written in Go, so your environment needs to be set up to run Go. The easiest way to do this is using Homebrew:
WarpStream Setup
After signing up for WarpStream, we’re going to log into the WarpStream Console and create a cluster. Then, we’ll use the ClickHouse ClickPipes data loader to produce data to WarpStream.
Step 1: Create a WarpStream cluster
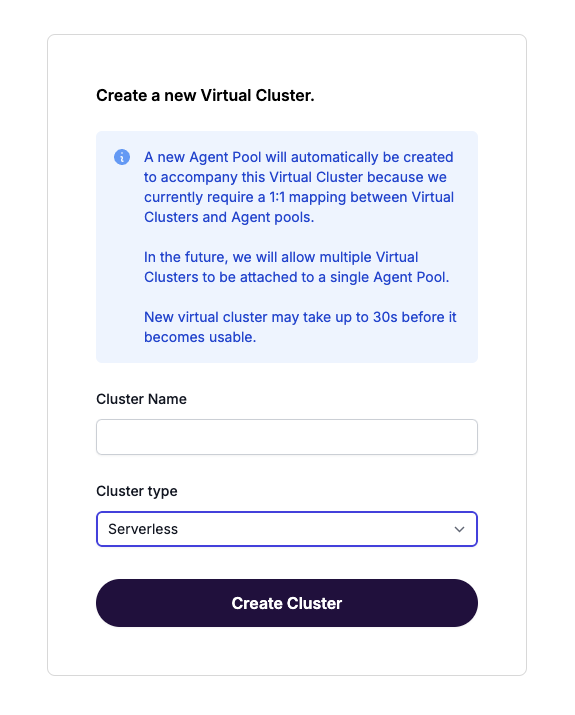
Log into the WarpStream Console, and click New Cluster.
In the dropdown on the cluster creation screen, select Serverless.
Then, navigate to the Connect tab, and click Create Credentials.
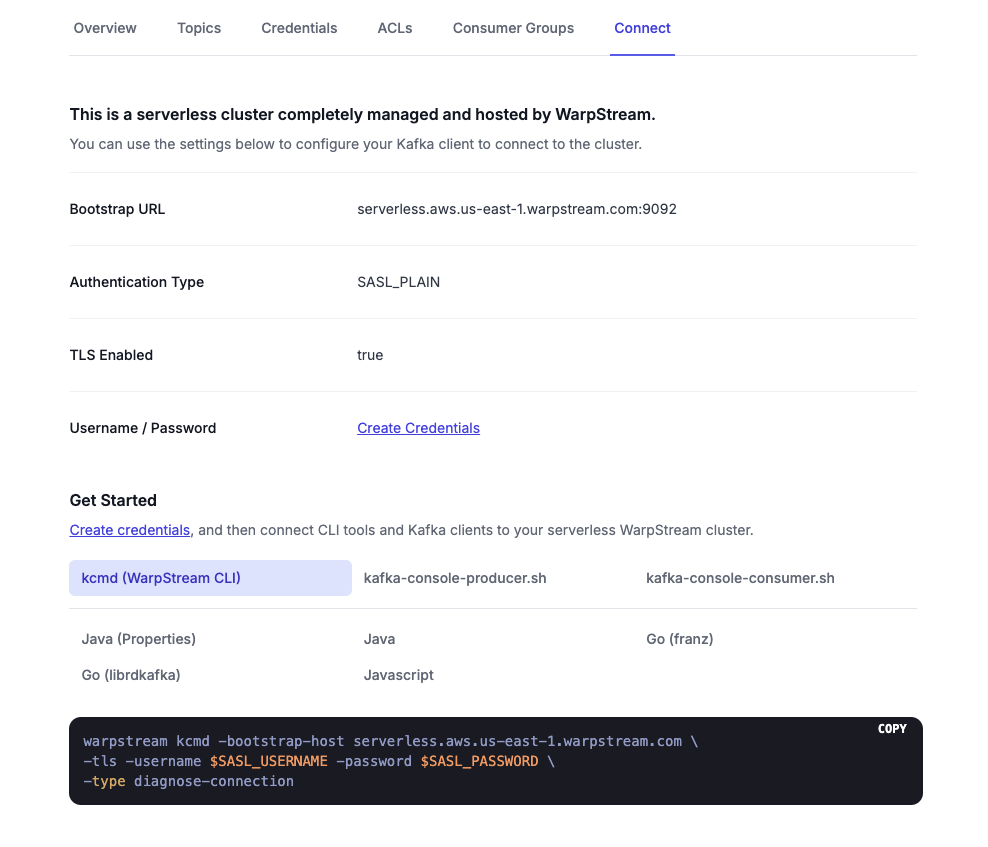
Store these values, as well as the Bootstrap URL, as environment variables for easy reference:
Note: Do not copy the port (“:9092”) for your Bootstrap URL. Just copy the URL.
Also, download the .txt file containing your credentials (you’ll need these later).
Step 2: Produce some Data
After your cluster is set up, use the ClickHouse ClickPipes data loader to produce some data to your WarpStream cluster.
Auto-topic creation is enabled by default in WarpStream, so you won’t need to create a topic manually.
The data loader is a producer client written in Go that reads data from a CSV file and writes it to a topic using the Kafka protocol. Simply download the contents of the repo locally, and download one of the compressed datasets linked in the README. Then, make sure that the file var in main.go contains the path to your compressed CSV. By default, we will be reading logs-534.csv.gz, but if you downloaded a different dataset, just replace the file name when you edit the path. There’s no need to uncompress the file.
Once your producer is running, navigate to the Topics screen in the WarpStream Console and click on View Details next to the newly-created dns_logs_topic_test topic to confirm that the producer is producing data:
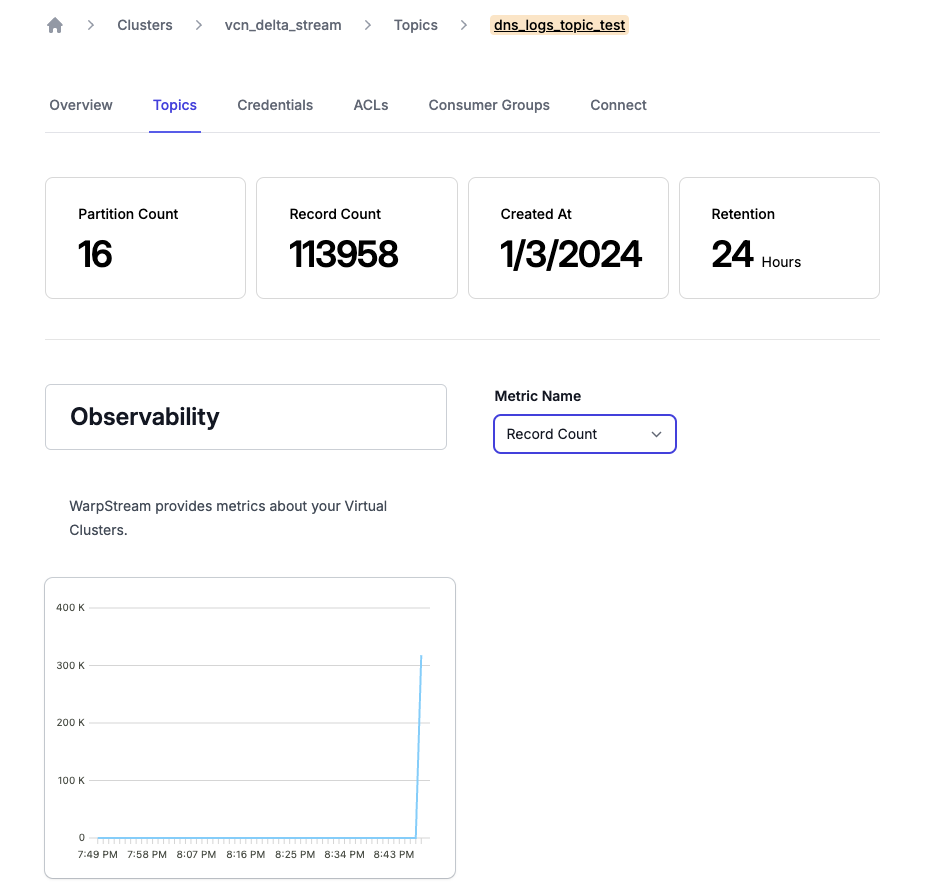
Congrats! You’re producing a stream of 10,000 records per second to WarpStream. Now it’s time to configure DeltaStream to process this stream of data.
DeltaStream Setup
Once you sign up and login to DeltaStream, you’ll need to complete two steps to start processing data from WarpStream.
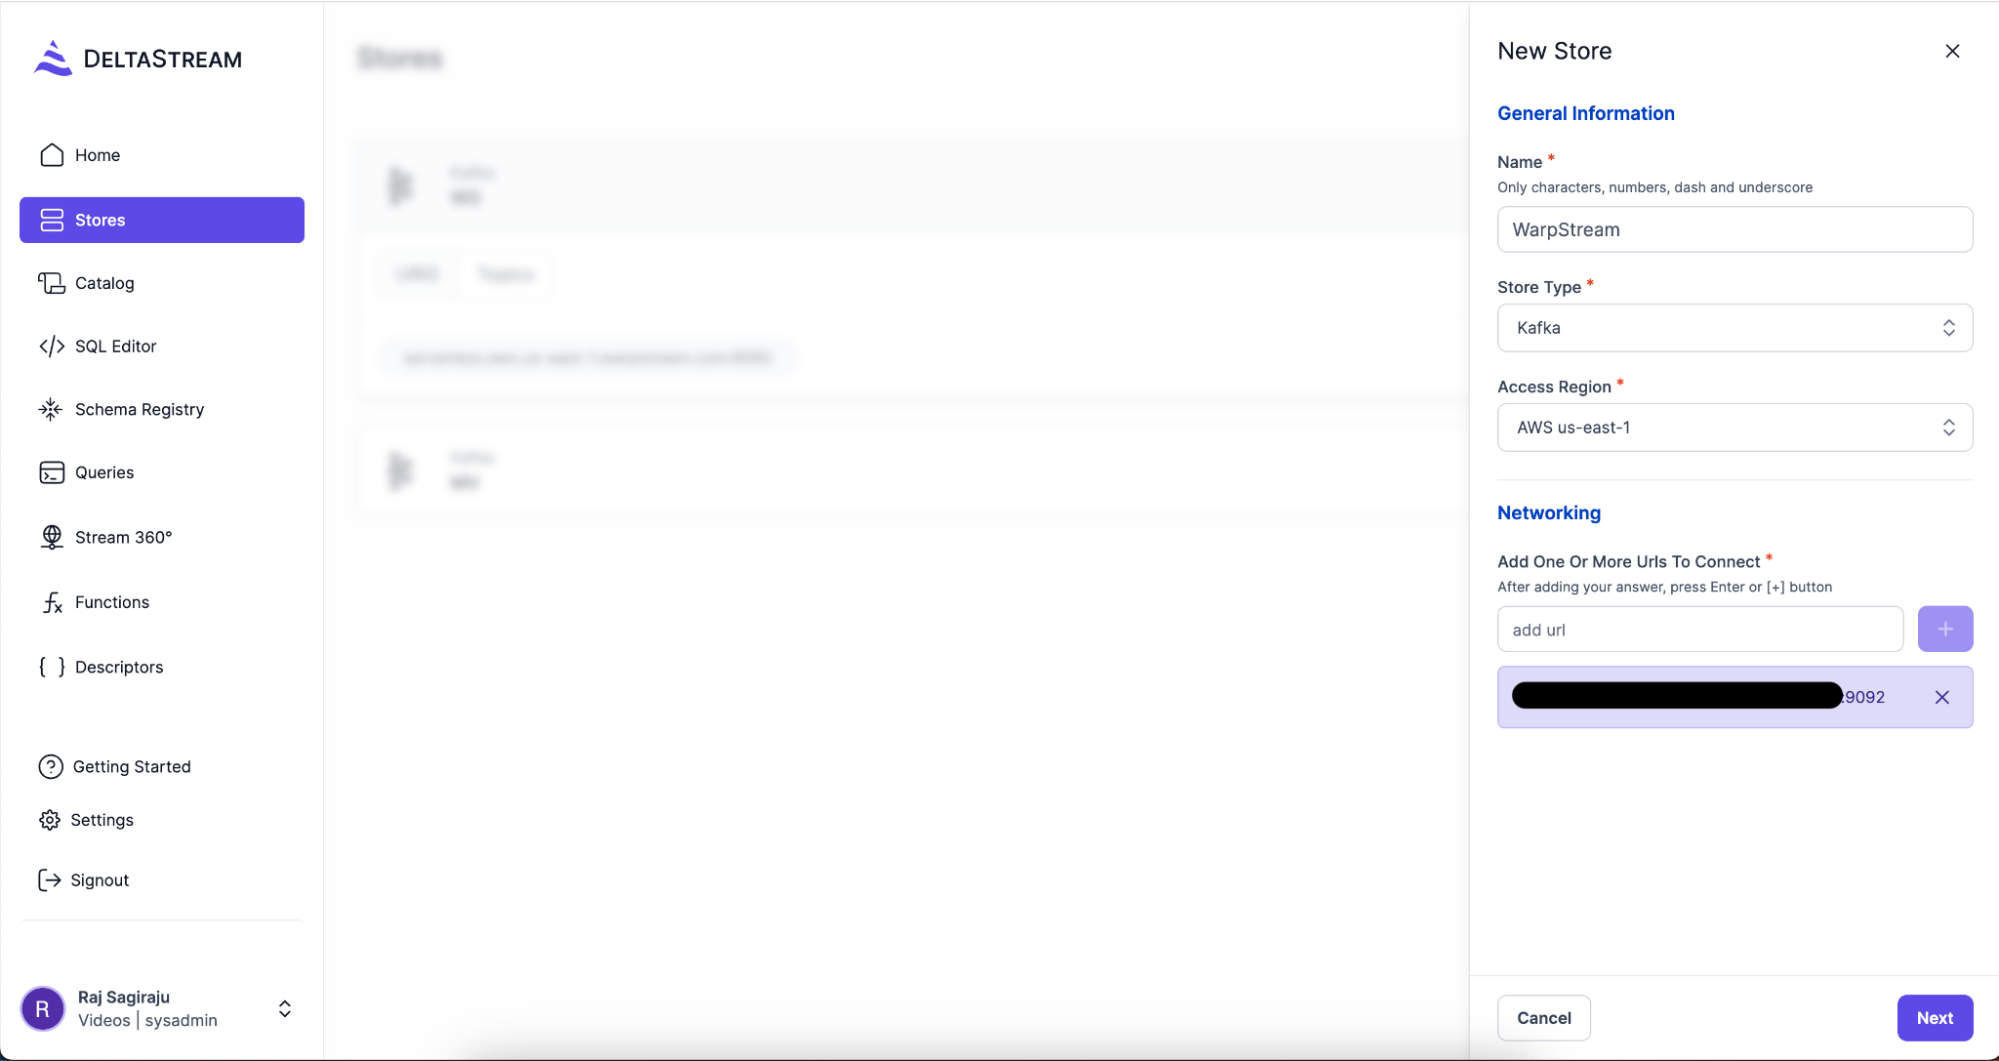
Step 1: Connect WarpStream to DeltaStream
From the Stores Tab click on New Store and provide the WarpStream Bootstrap URL (you can get this from the Connect tab in the WarpStream console. It ends in 9092).
Navigate to the Next step and provide the Username, Password and SASL Hash Function. Choose PLAIN in the SASL Hash Function drop down and for Username and Password use the credentials that you obtained from the WarpStream console when you created your cluster.
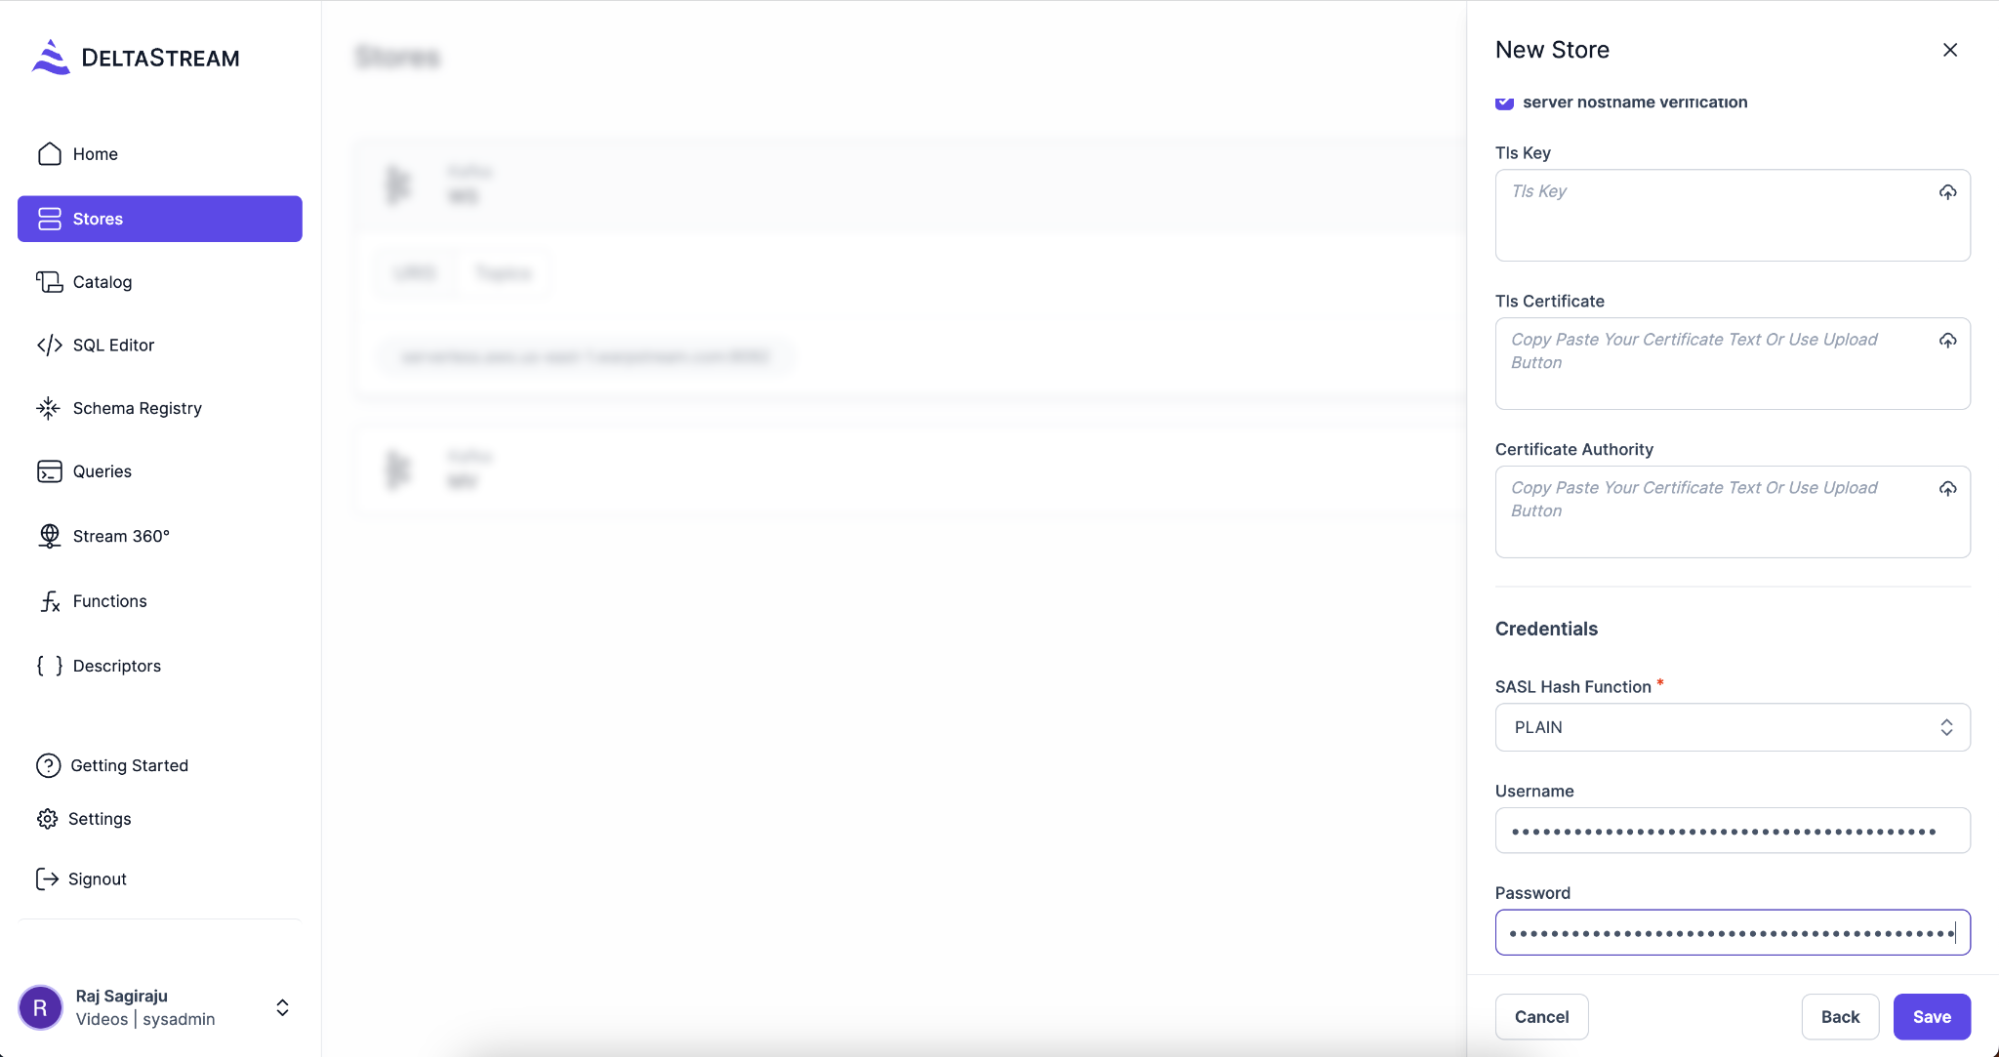
If you forgot to save your SASL password, that’s OK, just go back to the WarpStream Console and create another set of credentials.
Click Save, and now your WarpStream cluster is connected to DeltaStream.
Step 2: Create a Database
Create a Database from the Catalog tab. Give it name and Save.

Once this is done, you can start writing your SQL queries in the SQL Editor tab.
Process your Data Stream
Now, let’s do some stream processing. In this example, we are going to inspect a stream of DNS logs to capture errors based on the “status” codes. Here’s a sample message from the dns_log_topic_test topic on WarpStream.
To start processing the incoming messages, we are going to CREATE a STREAM called dns_logs using SQL:
From here we can filter out all the error messages as they come using a simple SQL statement:
You can take this further and store all the “filtered” messages in a new topic in WarpStream, so that you can use them for more downstream processing. This can be done using the following statement:
This statement runs continuously filtering all the incoming messages as they arrive and creates a new dns_logs_error topic on your WarpStream cluster to store the filtered messages.
You can also perform aggregations and Create Materialized Views. These materialized views are accessible over APIs, so you can build real-time dashboards and apps powered by these views pretty quickly.
This statement creates a Materialized View , which in DeltaStream is an always up-to-date snapshot of your data, of the error messages aggregated by the IP address (represented by remote_addr in the JSON). With this materialized view, you can:
- Geolocate where the errors are happening to help with diagnosis
- Stop malicious attacks
- Build dashboards to monitor errors and alert the right personnel
Conclusion
By now you should have a pretty solid understanding of how to create a streaming data pipeline between WarpStream and DeltaStream.
Next, learn how the WarpStream architecture is a better fit than Apache Kafka for streaming workloads running in the cloud, or learn more about how DeltaStream makes it easy to process streams of data.
With WarpStream and DeltaStream you have everything you need to build a real time streaming platform. Get started and take the first steps towards becoming an event-driven organization.
Thank you to the WarpStream team for co-authoring this blog.